
6 DIY Tips For Insane Product Photography

Most people have one of two opinions on product photography – either it’s a piece of cake for anyone with a smartphone, or it’s a highly sophisticated endeavour that requires the services of a professional.
We think the truth is somewhere in the middle. With the right equipment and some basic instruction, anyone can create great product shots. With these five basic product photography tips, you can create high-quality product images that will help you convert visitors into paying customers (or whip the media into a frenzy when they see your shots in the Flaunter library!).
Take formal product shots — then have some fun
When you’re doing product photography, you should make the most of your time and have fun. While you’ve got your camera, lighting and products ready, you should take a wide variety of pictures.
Make sure to get the clean, simple shots that show your product from all angles. Get the front, the back and the sides, and make sure to scoot in close for some detail shots. These images can be important for the customer when they are weighing a purchase.
“75% of consumers rate the quality of product images as ‘critical’ or ‘very important’ to their purchasing decision”
Use custom white balance
Have you ever taken a photo where the colours turned out very odd? Most likely, it was a white balance issue. On the flip side, when you get white balance just right, colours will look perfectly natural. Proper white balance is one of the best ways to get a great photo.
Just about every camera has the ability to use different white balance settings. Most cameras start on an ‘auto white balance’ mode, which (as the name implies) automatically analyses the light in your scene and chooses a proper setting… most of the time.
Auto white balance may be good enough for snapshots, but for top-quality product shots, you need to get manual. Dig into the settings of your camera and try to match the white balance to the scene with presets.
If those don’t work, you may be able to set a custom white balance using the Kelvin scale. Most cameras give options from around 3,000 K (very yellow) to 10,000 K (very blue). You can try to set this manually, but the best way is to put a white piece of paper next to your product and get up close. Then use custom white balance to set your camera off that piece of paper.
You’ll have perfect colour every time.

Pay attention to details
Getting high-quality product photography is generally a somewhat time-consuming process, especially if you don’t have a dedicated studio setup. Whatever setup you have, take the time to do the job right.
Take the time to perfect the lighting, get the background exactly right, choose the ideal angle and find the optimum colour settings to nail your image. It’ll take some time, but it’ll pay off when you don’t have to do much editing of your photos and when your customers start looking at those images.
Some things to watch out for:
Dust, fingerprints, or smudges on your products or backgrounds
Stray objects in the corner of the picture
Not focusing the lens properly on the subject
Camera shake and vibration
Low light levels (leading to high ISO, slow shutter speed and bad image quality)
Running out of batteries or memory cards in the middle of the shoot
Use reflections
One great way to create unique, beautiful product shots is to use reflections. Reflections create a feeling of depth and complexity in an image. There are a few ways to create reflections in a home studio.
A mirror. Make sure it’s thoroughly cleaned (with non-streaking cleaner), then put your product on top for a clean reflection. Shoot from a low angle, nearly parallel with the mirror, for best effect.
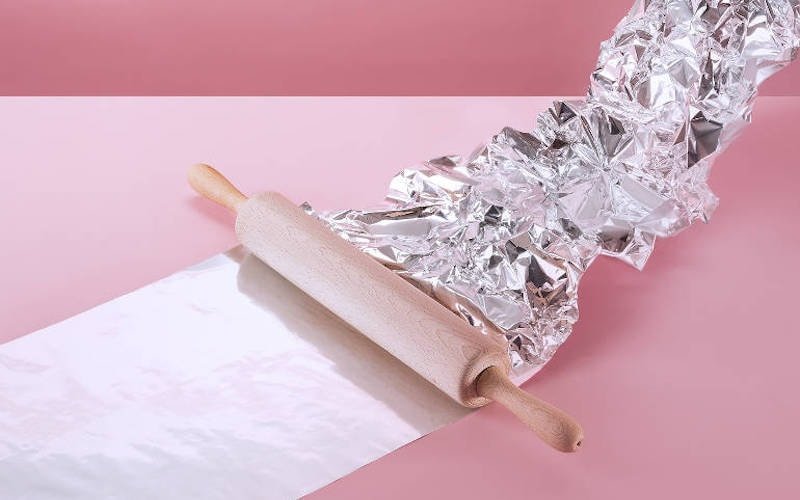
Aluminum foil. Peel a large sheet off a roll of standard cooking foil, being careful to keep it as flat as possible, then position it the same as a mirror. Be careful to keep the ragged edges out of the photo.
Water. Either place a thin layer of water in a tray and place your product there, or simply pour some water on a flat surface.
This method generally works best when you use a backdrop like construction paper or sheets to control the background — or when you have a pure white room — since you won’t want a reflection of your ceiling fan on your business page.
Light the background, not just the product
Even a novice product photographer will figure out that a product needs to be lit properly for good photos. But lighting the background is not intuitive. Believe it or not, lighting your backgrounds can greatly increase the quality of your product shots.
Lighting the background has two positives. First, if you’re planning to remove the background from your photos (or planning to have Pixc do it for you), a bright, clean background makes this process easy and provides the best results.
Even as a beginner photographer, using these five tips, you should be able to produce some great images for your products and reap the benefits right away.
Not sure what to do if you don’t have the resources?
Using photo editing tools like Canva is a great way to do DIY product photography if you don’t have the resources. Canva offers many features, one of them being a photo background changer that allows you to position your product anywhere, anytime.
Learn more about photo editing tools here.
—
THIS ARTICLE WAS ORIGINALLY PUBLISHED BY OUR FRIEND RACHEL JACOBS – HEAD OF CONTENT AND PARTNERSHIPS AT PIXC, A LEADING ECOMMERCE PRODUCT OPTIMIZATION SERVICE. PIXC TRANSFORMS AVERAGE PRODUCT PHOTOS INTO PROFESSIONAL IMAGES DESIGNED TO INCREASE CONVERSIONS. A LOVER OF ALL THINGS CONTENT AND GROWTH, RACHEL SPENDS MOST OF HER TIME PLANNING NEW CONTENT, FINE-TUNING GROWTH STRATEGIES AND TWEAKING EMAIL CAMPAIGNS. TAKE ADVANTAGE OF PIXC‘S FREE TRIAL HERE!
IMAGES: MARNI CAMPAIGN SS 17 BY GIOVANNI BIANCO; PHOTOGRAPHY STUDIO VIA PINTEREST; TIN FOIL BY VAN SANTEN & BOLLEURS